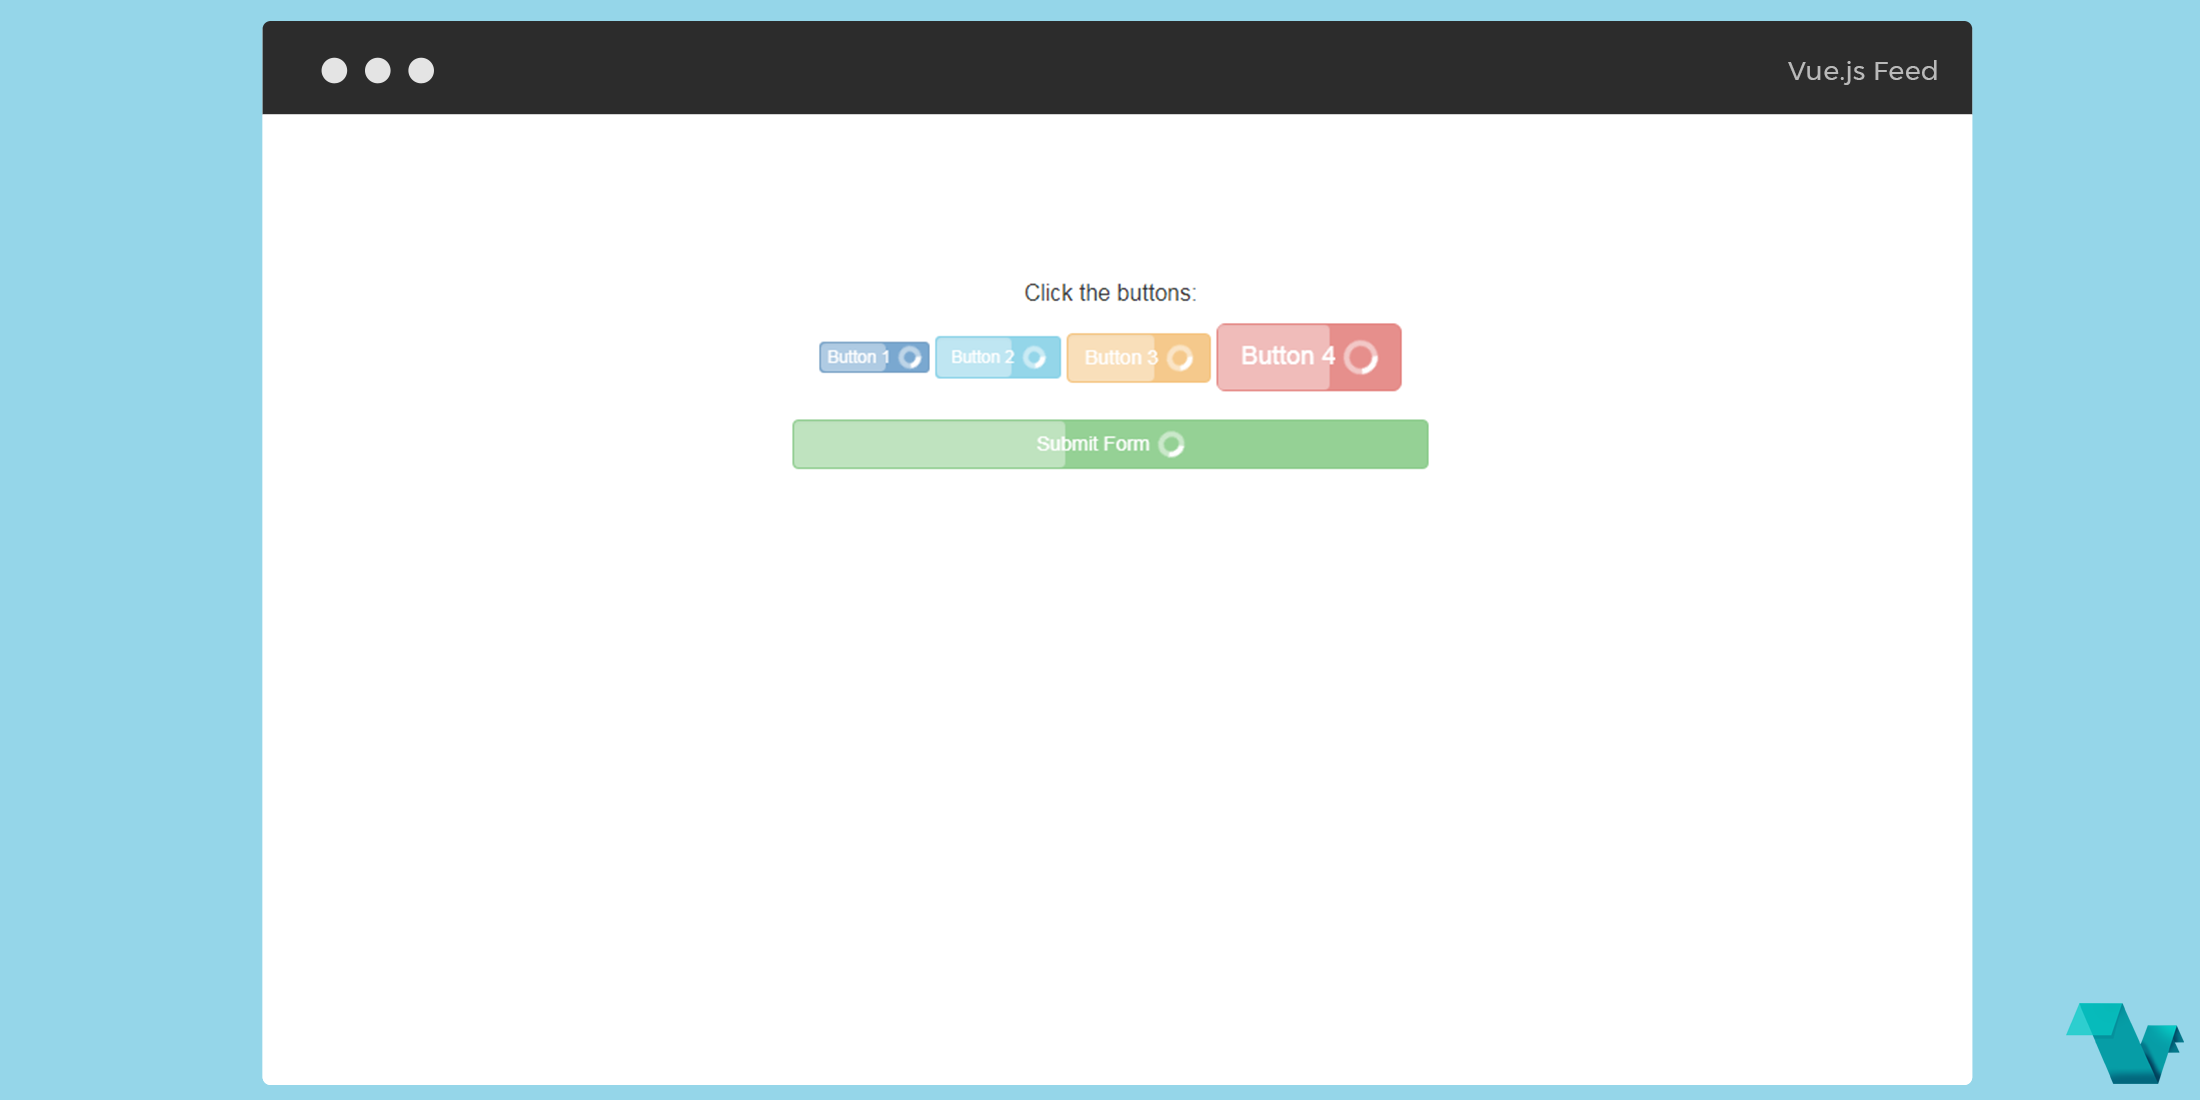
'Submit' button with built-in progress indicator powered by Vue.js
pieces/vue-submit
A simple implementation of Ladda in less than 90 lines of code with no dependencies. Ladda is a UI concept to give users immediate feedback, for more see here & here.
Using the vue-submit component you can create buttons with loading indicators, which can be used to let users know that they have to wait for a response, like when submitting a form for example.

Example
To be able to use this component you will have to add the vue-submit.min.js file into your project. Once you add it you can import it in your project if it is a modular one. If you just use a file for vue-submit.min.js don't forget to include Vue.
import Vue from 'vue'
import VueSubmit from './vue-submit.min.js'

Vue.component('vue-submit', VueSubmit)
(Note: The component adds "@keyframes spin" rule into your page CSS).
After this, you can use it in your single file components.
<template>
  <div class="hello">
    <vue-submit
            @click="send"
            :disabled="false"
            :progress='progress'
            :auto-progress="2000">
                    Send
        </vue-submit>
  </div>
</template>

<script>
export default {
  name: 'hello',
  data () {
    return {
      dis: false,
      progress: 0
    }
  },
  methods: {
    send: function () {
      this.progress = 1
      setTimeout(() => {
        this.progress = 0
      }, 2000)
    }
  }
}
</script>
The above code snippet can be considered a single *.vue file. Let's see the props used in this example.
Props
disabled- Boolean, works the same as regular "disabled" attribute.progress- Number, if (> 0 && < 100) the button will disable itself, and display progress bar and the spinning circle.autoProgress- Number, if > 0 the button will display fake automatic progress (similar to vue-top-progress-bar.autoProgressdetermines the time in milliseconds to reach 100%. You should set it to your typical response time. Default is 3000 ms.
The progress bar will never reach 100%, however, and will be stuck at 95% until you set it manually to either 0 or 100, in which case the button will return to its normal state.
If autoProgress is set to 0, you should provide the progress values yourself via the progress prop.
If you don't want the progress bar to be displayed, set the progress to 0.1 and don't update it until finished (then set it to 0).
The automatic progression is logarithmic; this means the progress bar will move slower and slower as it goes higher.
Considering the above, when the button is clicked the send method is invoked, which changes the value of progress from 0 to 1 and back to 0, using a timeout function. If you are looking for more examples check the "test/index.html" (these are all in a single HTML file), on the GitHub repo.